Monday, 15 March 2010

Last Upholstery Blog post

Well.. you might be able to see that I have not updated this blog for a very long time!

I haven't given up upholstery, but it's just oo big to do now! I have moved onto smalling things... Here are a Couple

Monday, 21 January 2008

Chaise of Dreams - Part 3

I know... here are the apologies again!

Sorry sorry sorry..
It’s been far too long I know! Anyway, here is the update! I think last time I was just marking out the buttons in the second layer of coir
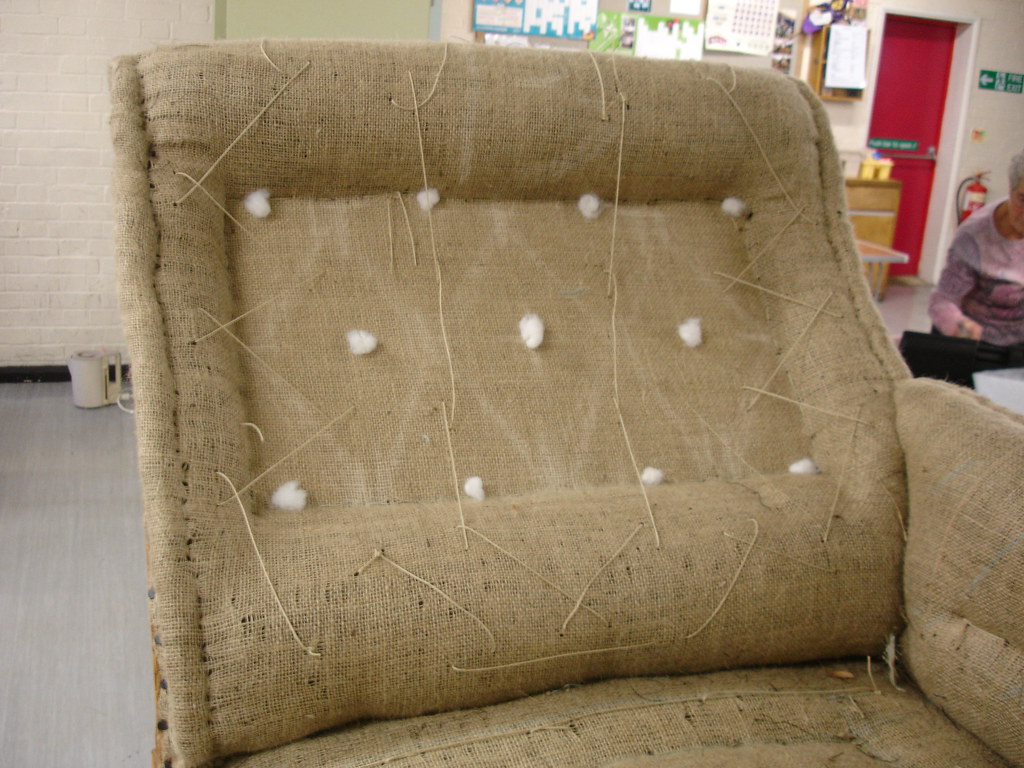
Well from this point onwards you place over the top of this some of that lush cotton wadding! (oh I love that stuff) and you make holes in that so you can see where the buttons are going to go...
You have to feed the buttons though using your double pointed needle with the both ends of the button tread through the eye... (oh yeah... check the skanky nail!!)
You push them through the Calico and then down the hole you have created and out the back -working from the centre outwards..
You have to tie a strange slipping and self tightening knot on the back... pity I didn’t take any photos really as when you describe it, it sounds bonkers! Both ends come towards you with the right hand piece shorter - this piece goes over the top of the left.. round the back and over the top and through its own loop but within the left hand piece.. see it sounds bonkers but it’s actually really easy!
You then put a piece of rolled up fabric in the space and slide the knot up to tighten the button... The Calico has been marked up to points where the buttons should roughly go... but when you start to put them in place you realise (quite quickly) that the lines are a rough guide! and you have to work by feel and eye a lot! you have to re-work a lot of the buttons and get them all equal distance.. plus get the fabric taught in-between... You should end up with a nicely stuffed and taught back... like this!
From this point onwards though I started getting into trouble! I had over stuffed quite considerably the back roll.... you can see from this photo how puffy it all is... when I tried to tighten the back it seamed to be an impossible task... and I reworked it about 4-5times until I realised (Jan told me!) that I should take out some stuffing and see what happens... so I took out some.. and then some more.. and then some more... until it was smooth and even...
I realised after I had finished that I had taken out enough of the coir stuffing to completely do the arm!!!

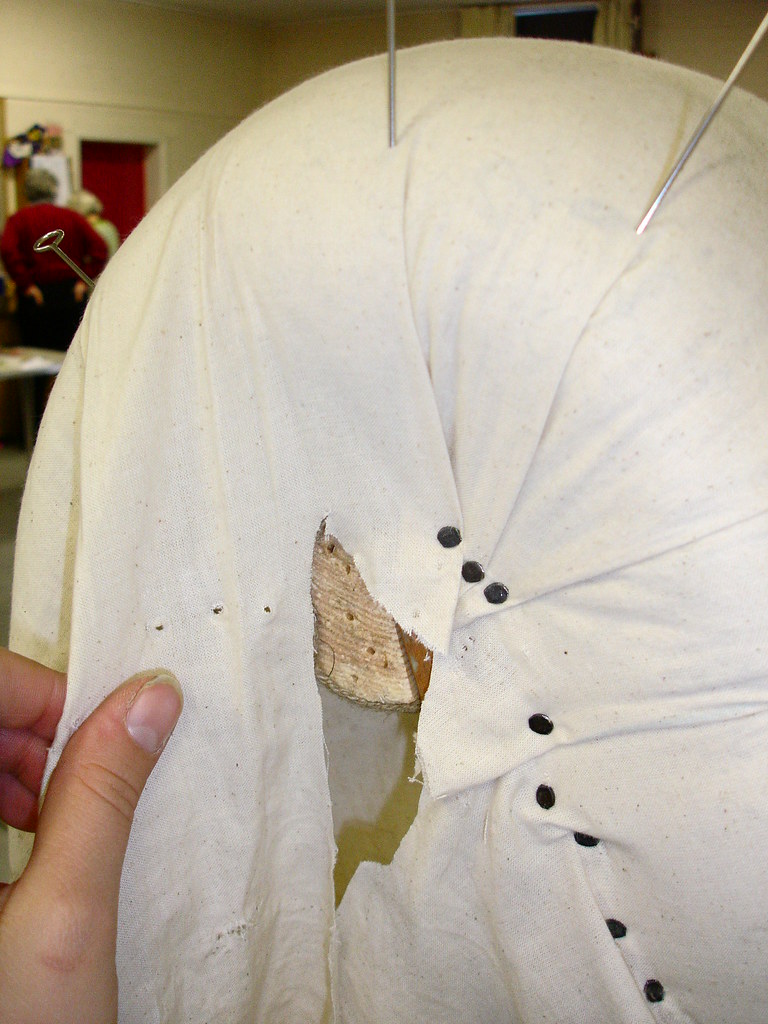
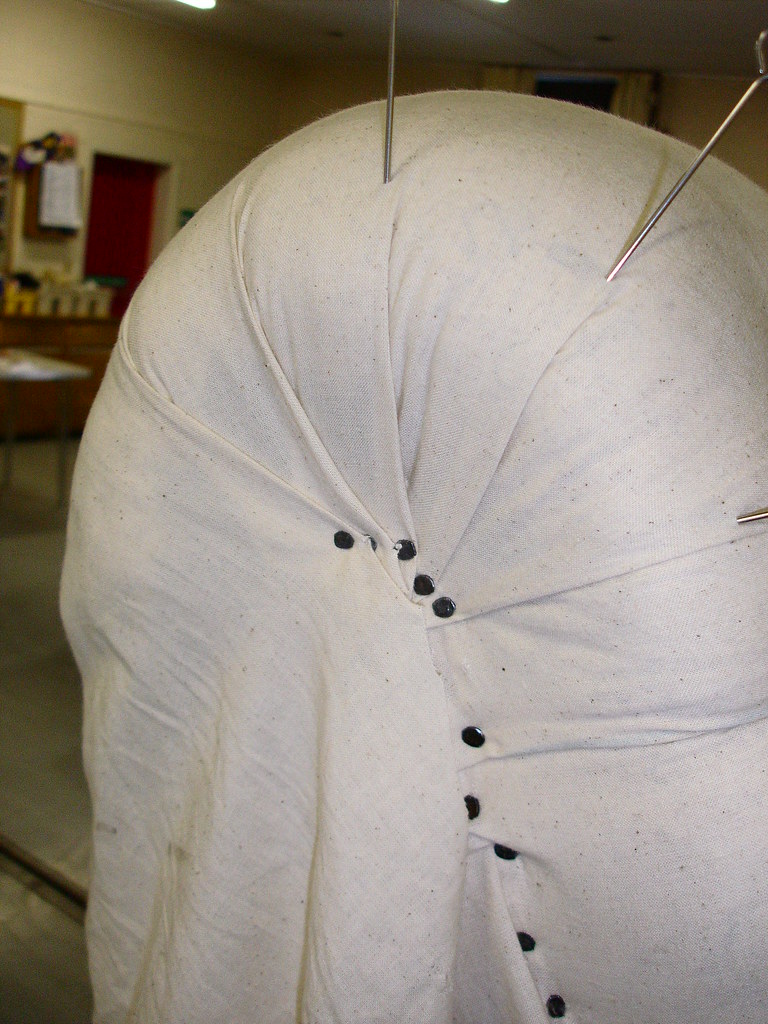
Once the back roll was in place I started working on the pleats around the sides.. cutting and folding all the way round until you have the perfect flat side
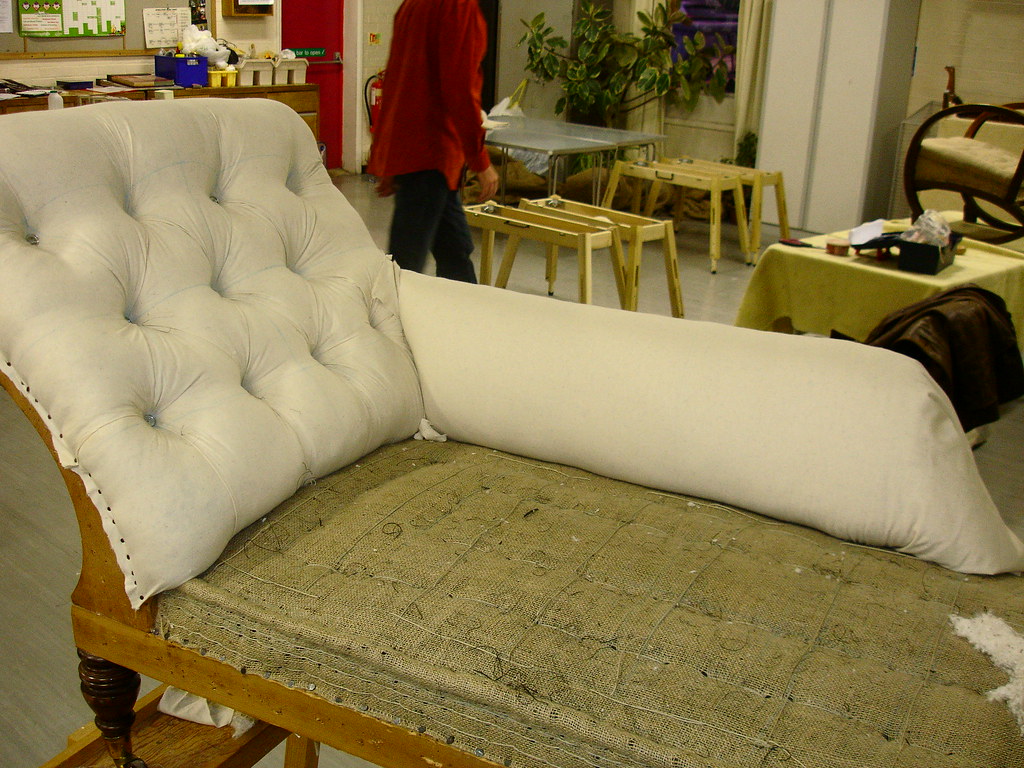
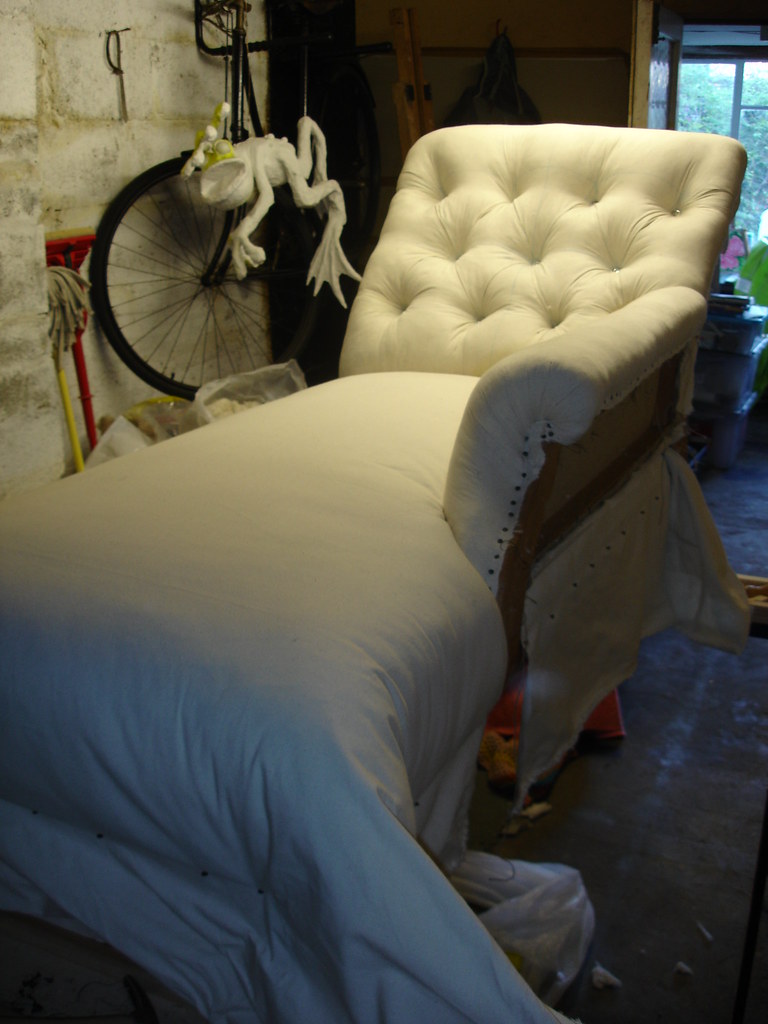
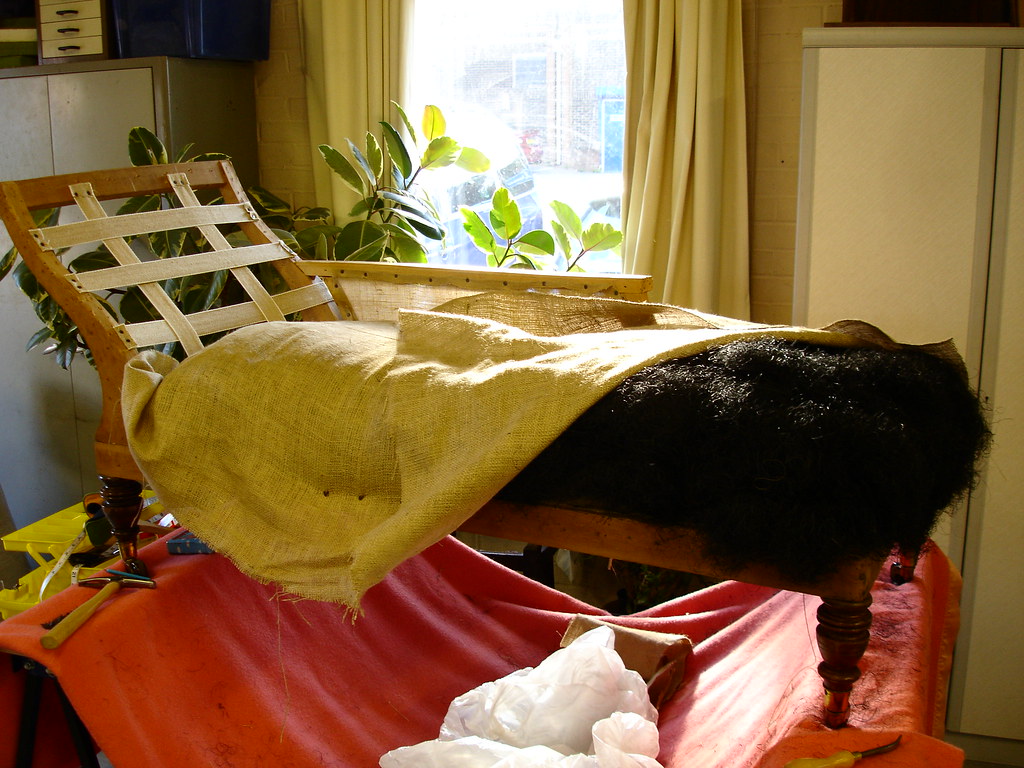


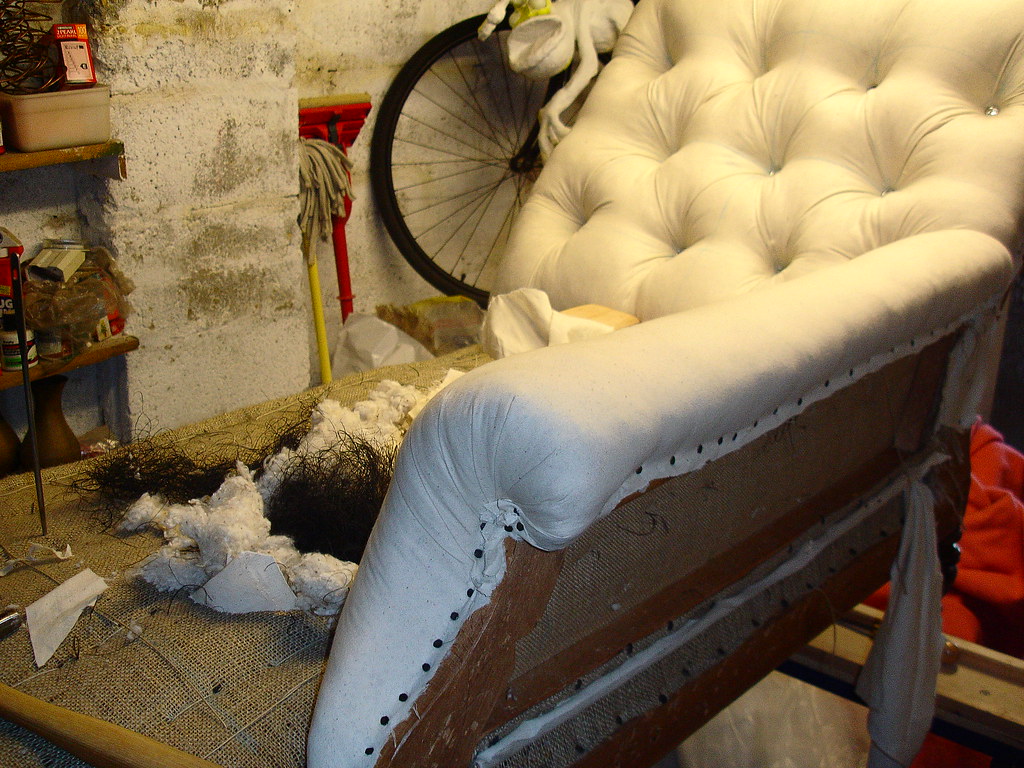
From this point onwards there wasn’t much else that was of any difficulty.. the arm was stuffed and the same types of plates were applied to the end scroll


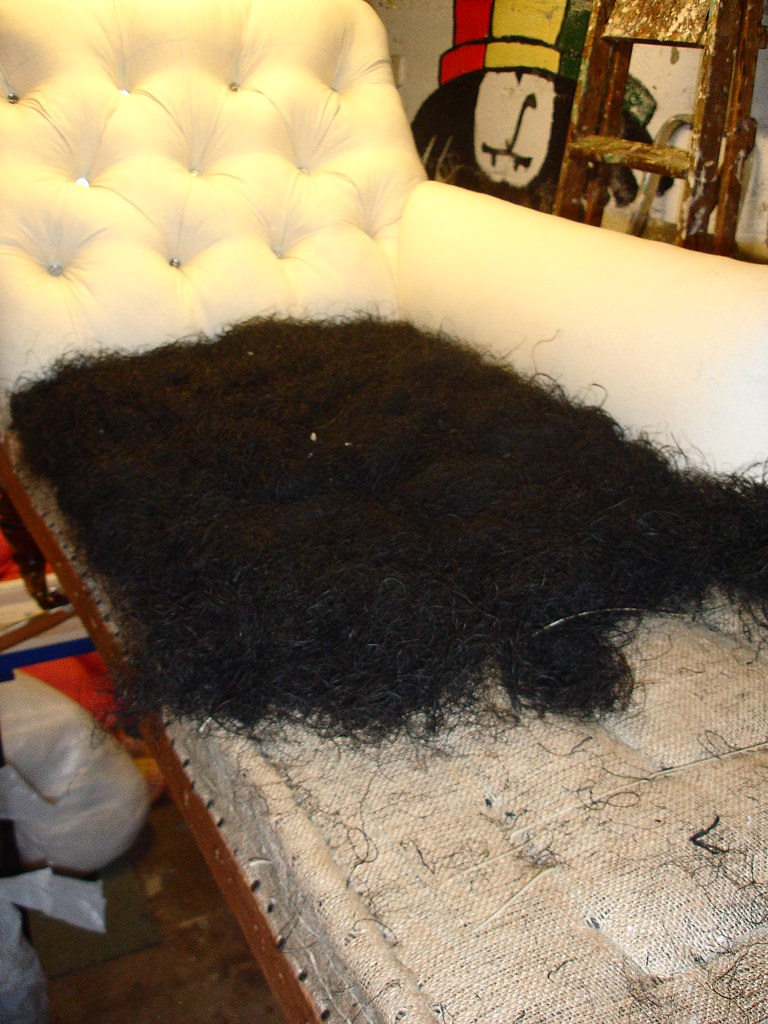
The Seat are had it's second stuffing too.. complete with corner pleates!


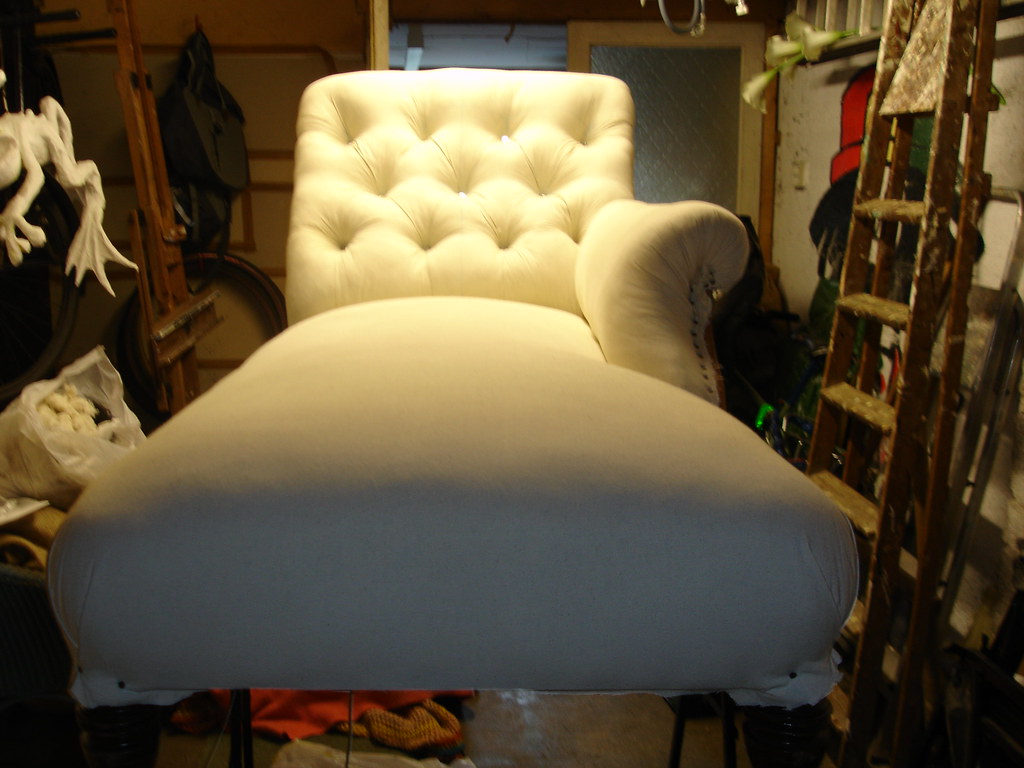
Once all the Calico was on I stood back and was quite amazed by my own handy work (even though I do say so myself)

I am currently working on the top fabric and I will show you some pictures soon...

Don’t forget for sneaky previews go to
www.flickr.com/photos/abstar

Tuesday, 27 November 2007

The Chaise of Dreams - Part 2

Dear Furniture Fans....
This will be a short blog... I will let you kow what I have been doing without too much blerb... I think all this writting just gets in the way!

I think last time I finished with Springs? cant remember soooooo long ago... and yes again I have been slack in my keeping you up-to-date! (sorry)
Anyway, I have done loads...

The last pic you saw I think was... this one of the Coir going on

Well, as lot has happened since that photo! The Coir (over7lb's) was put on the chaise...

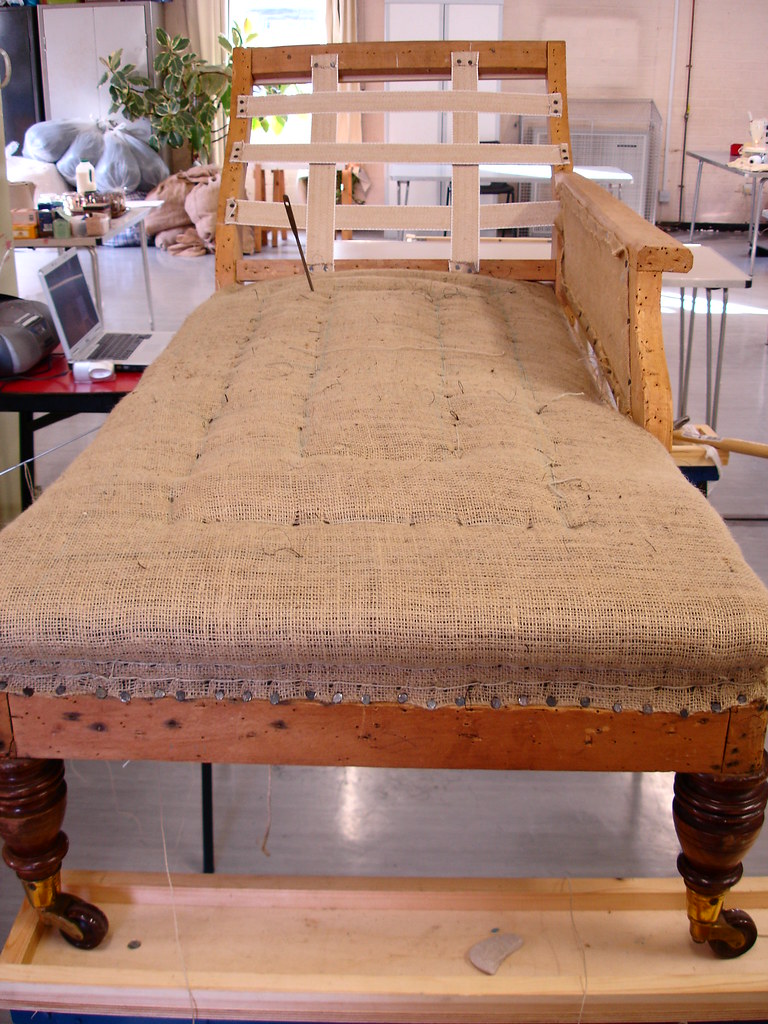
The centre of the seat was sewn through and tightened beyond belief.... and the sides then release so they could be stuffed more! I then did three lots of the blind stitching to create a really straight edge up the side.. then it had the top roll stitching sewn in... and as you can see this is rather a large Chaise so this took quite some time.. but I am getting faster as I get more and more used to it!!
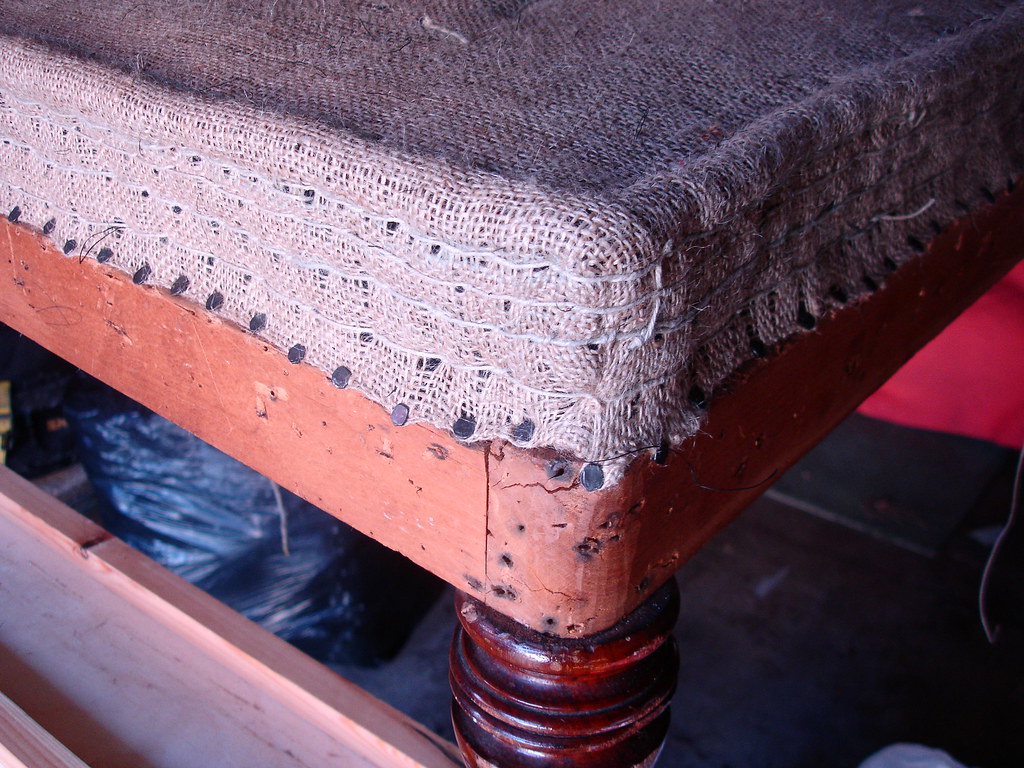
The seat now looks like this...

I have had to complete the same process on the arm (it didnt take too long)

I then tackled the back.. this was different.. I hadnt ever done this before.. because you see the thing that is going to be a real headache is I am buttoning the back!! yes you heard it here first.. exclusive... buttons!!!

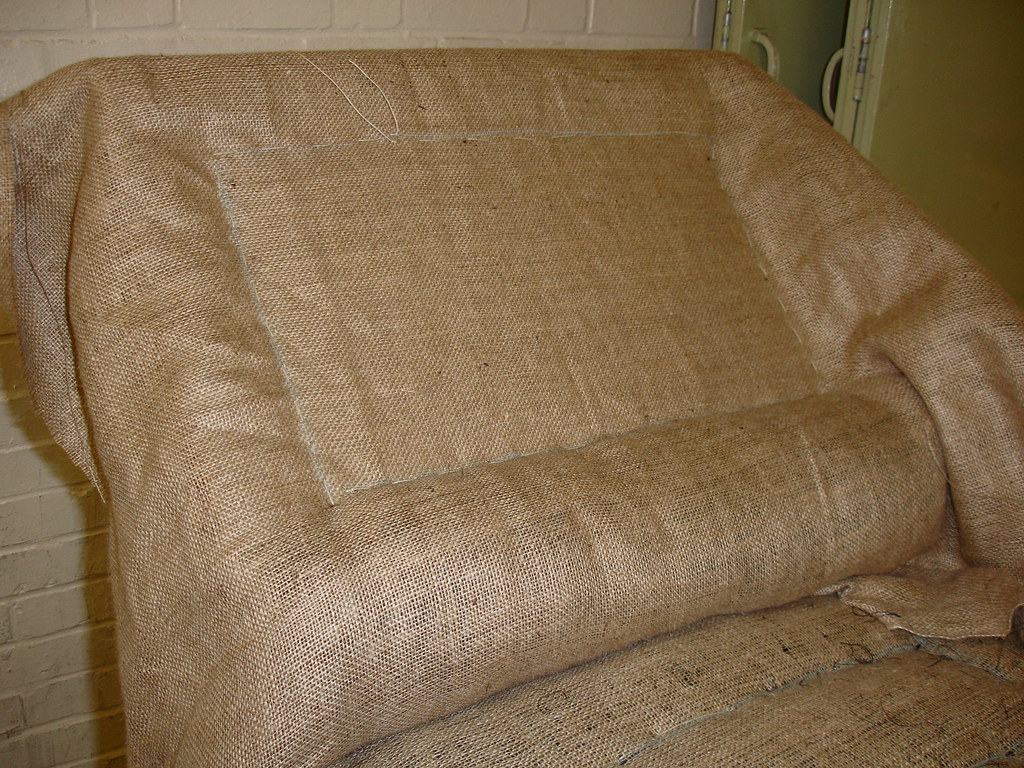
The Back then had to start a little different... the hessian went on over the webbing as normal.. but then I sewd another piece of hessian in the square to the centre... leaving a flat section! (see pic if you are confussed)

I then lifted all the sides and stuffed underneath and tacked down to create a back roll all the way round the edge without disturbing the centre - this is left flat so you can burtton!

This stuffing also had to have blind stitching and top roll to create shape... and curve (ooh, isnt that posh)
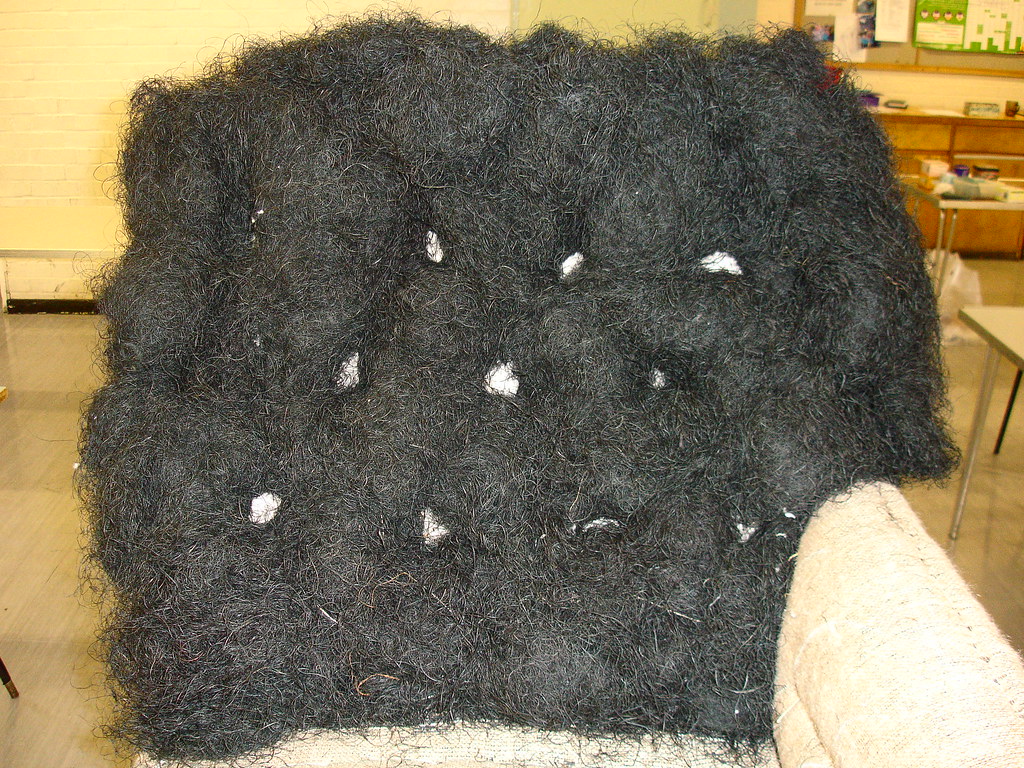
Now... from this point onwards it all got a bit too much... I didnt realise that buttons were so much work.... I marked out by sewing cotton wadding on places where the buttons were going to go.. and then did a lot of bridal ties to keep all the hair in place... I did go a little over the top with this!
Well... after saying this would be a short blog... it has turned out to be quite large after all!

I will let you all know what happens next... it's very exciting! but a lot or hard work.. and you get to see the infamous "Black Finger Nail"!!!

if you cant wait visit my Flickr

See you all soon darlings!

mwah* mwah*


Wednesday, 14 November 2007

The Chaise of Dreams - Part 1

Hey there furniture fans...

I have a treat for you guys... I have done LOADS on my chaise! oh yeah baby... it's really coming on fast! Last time we spoke I think I was just showing you the frame... well you are in for a treat!
Here is the starting picture for you..
Yes its a tidy frame! The centre bar is missing - all that remains or gave me any indication that it was there are the holes where it would have located - so I have had to put in a strengthening bar in the centre (sorry no picture....)
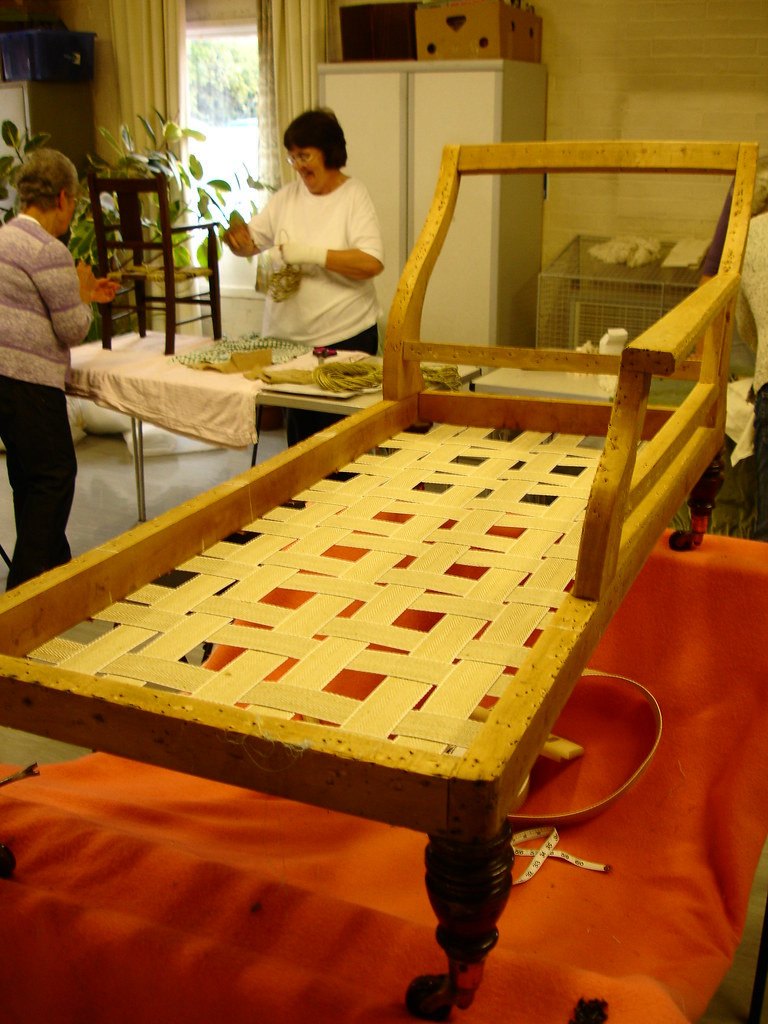
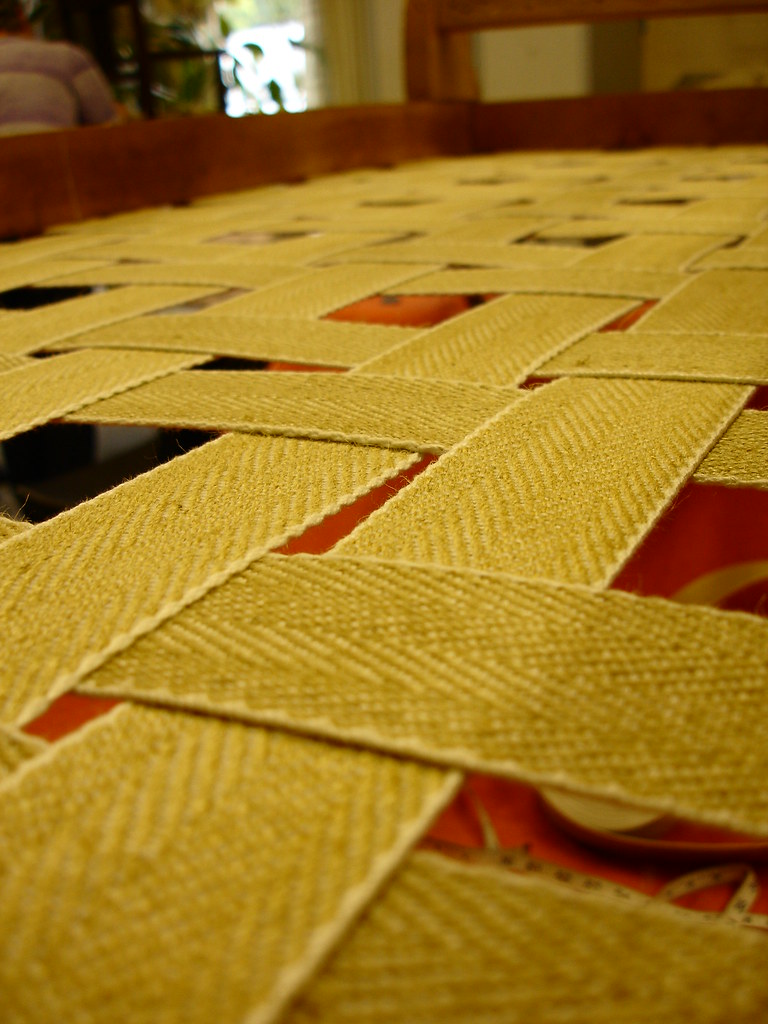
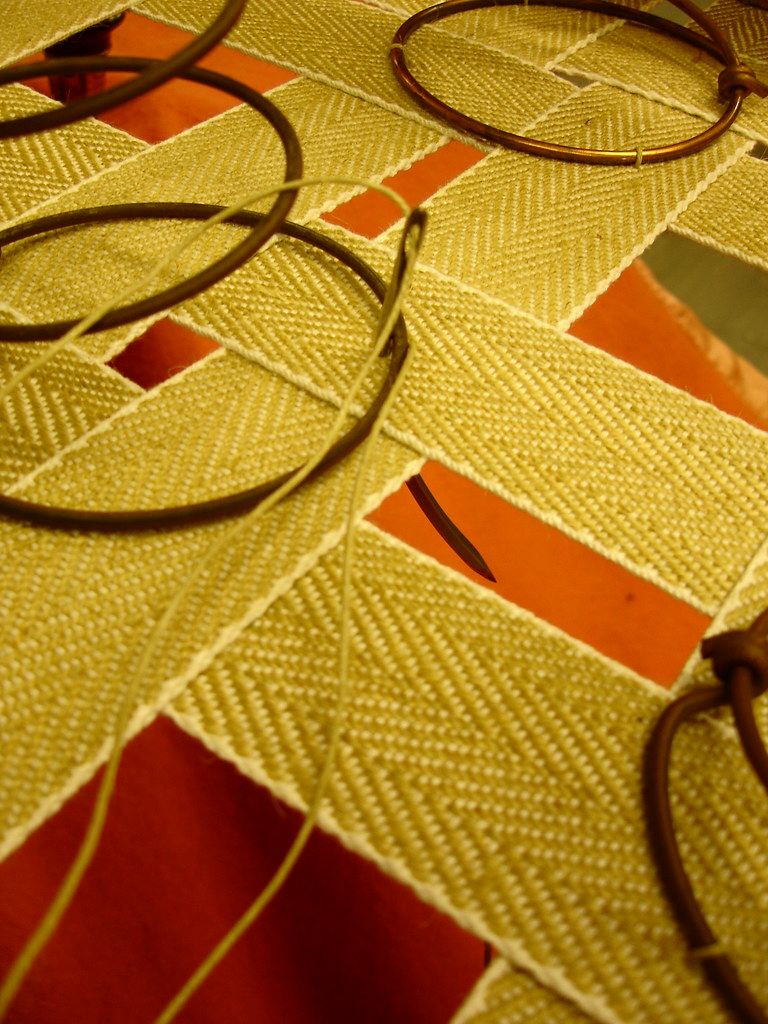
I then had the webb the underside - same af before... stretching the webbing over the under side of the frame so the springs can sit and be held in place


Same as before the webbing is woven under and over so you can hold all the springs in place.

They all get sewn down to the webbing and the lashed down to create tension...


You can see the tension bar I put in the frame in the right hand picture...

I will leave you with this tantalising image....


and run off.


I will write again soon with the further progress I have made... oh it's sooo exciting!


if you cant wait check out www.flickr.com/photos/abstar

Tuesday, 16 October 2007

The New Project - Chaise Longue

Hi there... I know I have only just told you guys about the fab finishing of my chair, but I am now starting a new project.... a Chaise Longue!


It was a complete mess and I stripped it rigt back to the frame (which is is very good nic)


I have only just started it so here are a couple of pictures of the stripping.


I will be updating much more frequently - I promice!

check my normal life www.flickr.com/photos/abstar


Wednesday, 10 October 2007

Victorian Nursing Chair - Finished at last!

Yes you heard it here first.... just before all the newspapers got this scoop... I have finished my chair!!! (round of applause please?) and if anyone would like to buy it... £600


(this photo does not do it justice!)

Now... I'm just trying to remember where I left off in the last post.... I know it was a long one as I hadn't updated for ages... so I must have covered a lot of ground! ah-ha.... Now I know, I had just finished the final stuffing and covered it with Calico! (wondrous fabric that I adore)


Well here is where all the stress started! I chose a beautiful fabric... it's very difficult to photograph and even more difficult to describe! But basically its a pale blue and gold pin stripe.. but in reality it takes on a green shimmer and looks different shades from different angles!


It is amazing... and also a complete bi*ch to work with! Not only do you have to get the stripes to match up.. but you have to get them to be straight too.. and with this fabric being quite fine... all lumps, bumps, wiggles, anything that you would rather not be there gets exaggerated by 200%!!! great! (yes that is sarcasm) But I went ahead anyway as I knew this chair not only suited the fabric, but that it would look amazing covered with it!

The first stage of the final fabric is the seat... I covered this is polyester wadding, but I think in future I will be using the old method of cotton wadding between fine sheets of fabric/paper which is natural... (becoming a hippy in my old age...) once the wadding is cut to size the top fabric gets laid on... you have to find the middle of the chair and the middle of the fabric and line up the front and the back so the stripes are straight... plus when you start to tack down the fabric you have to work from the centre outwards... otherwise you pull the strips out of line! (as you can see this took quite some time)

Once all the tacks were in place, I spend quite a lot of time folding and tightening the front corners... this is because its an area which gets a lot of wear and its also in a very prominent place so it has to look just right! and you also have to selectively snip and pull around the arm join to get that all puled down with no wrinkles!

At this point I would like to apologise for not having photos... I'm afraid that I was so occupied with getting the chair just right I forgot to take any! - sorry

Then comes the back... this is done in the same manor, Polyester wadding then the top fabric worked from the centre out, and with the top corners these also have to be tight and very neat.. (turning a bit OCD at this point)

But the worst job of all.. the one that made me scream (and if any of you know me.. this takes quite a lot) was the arms! This chair is beautiful because of the proportions and also because it has scoop arms, which means curves in three directions at once!!!!


They took me forever! once you got the fabric tight and smooth in once direction there was a wrinkle in the other!! but, persistence played its role and I got them in the end....


It was at this point that I stood back and looked at what I had done and I was chuffed! then after talking to Jan, I realised I still had quite a bit to finish it off!!! (dam dam dam)


Jan said... "Your nearly there, you just need to do the outside! which means... hessian, wadding, and top fabric.. oh and don't forget the piping and the hand stitching!!"


so I set to work... first hessian

then polyester wadding (see pictures)

So once this was done on both sides and the back I had to get the top fabric ready.. So I pinned it on once side and started to do a ladder stitch up from the bottom right the way to the top back... it looked rubbish! because I havent ever done this stitch before it was very lumpy... so I decided to take it all off... (ahhhhhhh) and start again with piping!


So all three sides were pinned on and I drew a chalk line round where it was going to curve round the arms... then I pinned the back and the side together and made notches to show there the fabric joined up for when I sewed it together on the sewing machine...


I then had to make the piping.... its quite difficult to explain.. You get a wasted piece of the top fabric and start drawing (in chalk) diagonal lines... and this is where is gets complicated to explain... here is a drawing...

You have to sew this up into a tube and then cut down the lines.. and because you have off set the numbers (and subsequentlythe sewing) you end up with a long thin piece of fabric that you can use for piping!

You get the fabric and place some cord onto it and sew it so the fabric covers the cord, I had to make sure I had enough to go from one side of the chair to the other...

But once this was made.. things started to speed up....


I sewed the sides and the back together with all the piping in place (you have to really think about this because everything is back to front or inside out)


Once the machine sewing was all finished I attempted to put the top fabric on....

Firstly you want to get a good straight edge where you can.. so with the back you attach it on with cardboard and staples.... sounds funny but you have the fabric draped over the chair with the wrong side facing you and you attach it to the chair... you then flip the fabric over and tack it underneath... making a good straight edge...

You then pin all the piping in place and start to sew it on with a ladder stitch - just like I did it before... but this time better!

I spent over two hours just sewing this on.. but when I stepped back and saw what I had done.. I knew it had bee the right decision.. the piping was "proper bo"!

I couldn’t believe how much of a difference it made!

Well... I then looked at the back seams to check they were tight to the frame.. but they werent.. but I wasnt scared of hand stitching any more and I started to pick them apart and sewing them up by hand... and this didnt take too long! I was quite surprised!

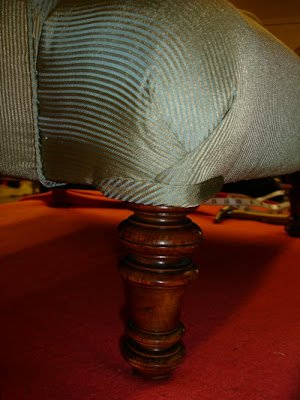
I then set to work on the final details... I put diagonal striping fabric round the front legs... and tacked all the excess fabric under the chair and added the black finishing cloth to cover all the springs and webbing (god that seams a long time I ago I did that)

Here is a selection of photos I took once it was done...


I am very proud of what I have achieved here... This is a fully traditionally upholstered Victorian Nursing chair... lovingly restored by my own fair hands!


Remember what it was like to begin with...?


And now check it out! oh yeah... it's been pimped!


COMING SOON..... CHAIS LONGE! woo hoo....

check out my life at www.flickr.com/photos/abstar